Starlink dish the size of a laptop? A smaller, travel-friendly Starlink dishy could be in the works!

SpaceX is in the process of developing a smaller Starlink dish that could be as portable as a laptop. Recently, the company filed an application with the Federal Communications Commission (FCC) to seek permission to sell next-generation Starlink dishes, one of which boasts a smaller form factor. This dish is designed to provide consumers with high-speed, low-latency broadband access regardless of their location, including rural and remote areas where mobile or portable applications are essential, according to SpaceX.

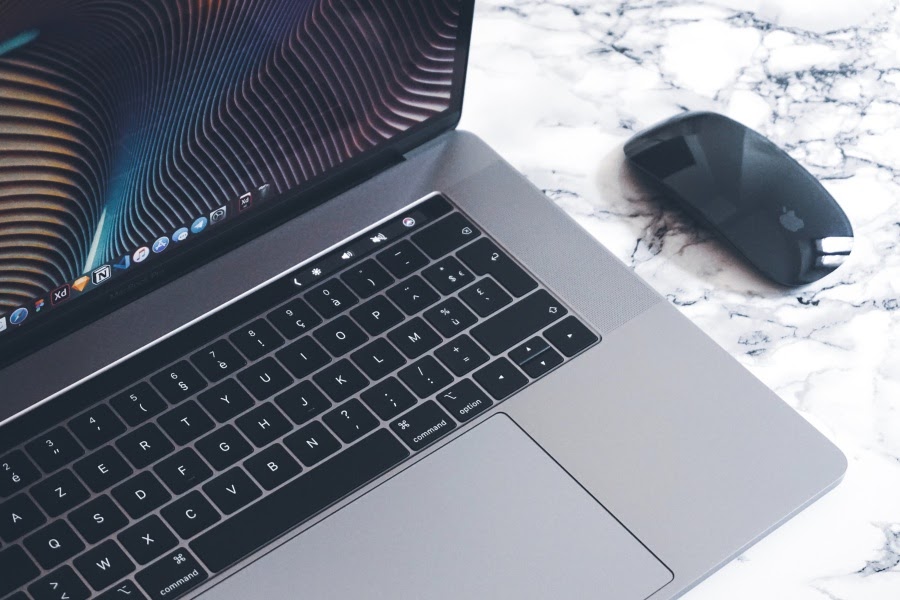
Details shared by SpaceX in a separate document reveal that the new dish will measure approximately 0.29 meters by 0.25 meters, making it comparable in size to an Apple MacBook, as pointed out by Nathan Owens, an engineer who closely monitors Starlink developments. In comparison, the existing consumer Starlink dish is considerably larger, measuring 20.2 by 11.9 inches and priced at $599.

Although specific improvements made to the new dish have not been disclosed by SpaceX, the FCC application highlights that the company has been continuously working on developing and refining user-terminal models, resulting in the improved design described in the application.

The FCC application also mentions another next-generation Starlink dish that is positioned as a high-performance solution for both consumers and enterprise customers. This dish will measure approximately 0.57 meters by 0.36 meters, making it smaller than the current high-performance dish from SpaceX, which measures 22.7 by 20.1 inches and is priced at $2,500.

SpaceX has sought FCC licenses to utilize their Starlink dishes in stationary as well as mobile applications, such as on vehicles like cars, boats, and planes. This suggests that SpaceX may introduce updated dish models for sale in the future, pending regulatory approval. The new hardware will have the capability to communicate with both the initial Starlink satellite constellation and the second-generation, which the existing Starlink dishes can also do.

Furthermore, SpaceX has plans for other next-generation Starlink dishes. In a recent FCC application filed last month, SpaceX has requested a temporary license to conduct testing for up to 200 new Starlink dish models, indicating ongoing development and innovation in their satellite internet technology.
SpaceX To Launch Laptop Size Starlink Dish - Perfect for Remote Connectivity

Google Drive is our easy option when it comes to sharing files — be it for personal or work team collaboration. And it’s easy to see why. Aside from the fact that it’s free, it got a plethora of apps you can use to even supercharge your workflow and save your time in the process.

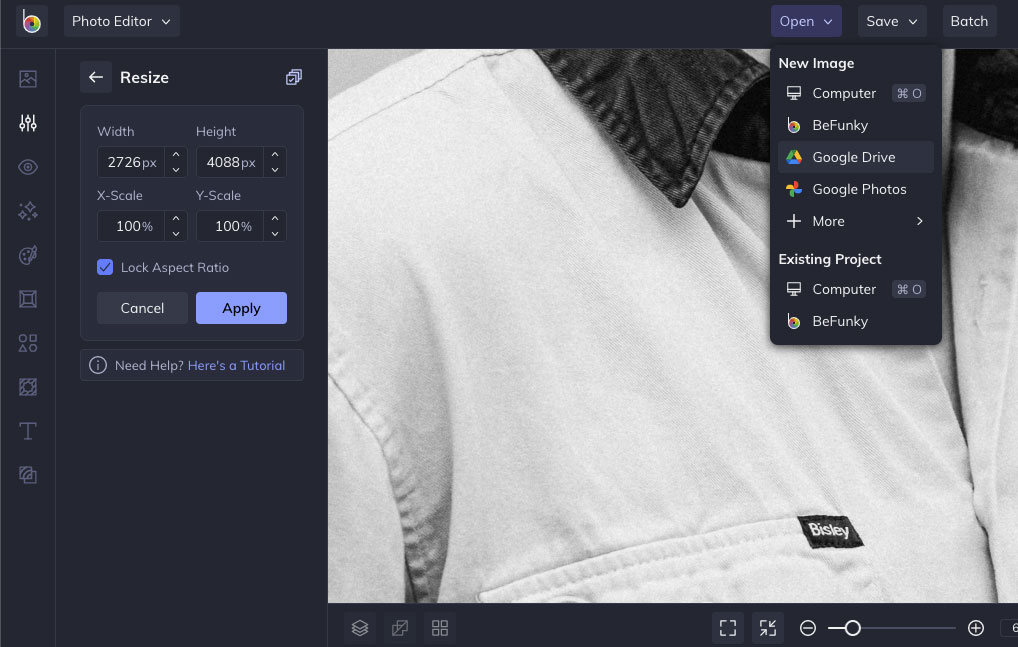
One of those Google Drive apps that I stumbled upon is BeFunky Photo Editor. If you live in a country where internet is an issue (read: slow, expensive, and often capped internet), BeFunky Photo Editor will do you a favor.

Few days ago while finishing a customer’s website, a client shared a Google Driver folder containing a bunch of images to load up into his landing pages. The problem: the images came straight from a DSLR camera and were almost 30mb each. And we’re talking about 70-100 images.

Imagine the frustration I felt realising I had to download them all using my capped internet data so I can crop, resize them offline. I only needed at least 1200px wide versions of those images.

5 Handy Google Sheet Tricks To Help You Work Fast & Save Time

Just as you can unzip files on Google Drive without downloading them, there has to have a way to also crop, resize images straight from Google Drive without downloading them for offline editing. So I ended up rummaging through Google Drive apps directory and discovered BeFunky Photo Editor.

Easily Crop, Resize Images on Google Drive without Downloading them

google drive crop resize images

BeFunky Photo Editor is a top-rated photo editor on Google Workplace Marketplace with 4k+ users as of writing. It’s one decent, full-featured photo editor that works straight from your browser. Probably the biggest strength of this app is the simplified editing controls, making it easy to edit photos with a few click.

BeFunky is a uniquely powerful online and mobile photo editor. Think Photoshop, but simplified for everyday users. With BeFunky, you can easily create stunning, professional-quality images with a single click. The process might be simple, but the results are incredibly sophisticated. Thanks to BeFunky, there’s no need to choose between a powerful, do-it-all tool and an easy, user-friendly interface. We’ve got it all!

Here’s how to get started:

  1. Navigate to your Google Drive folder

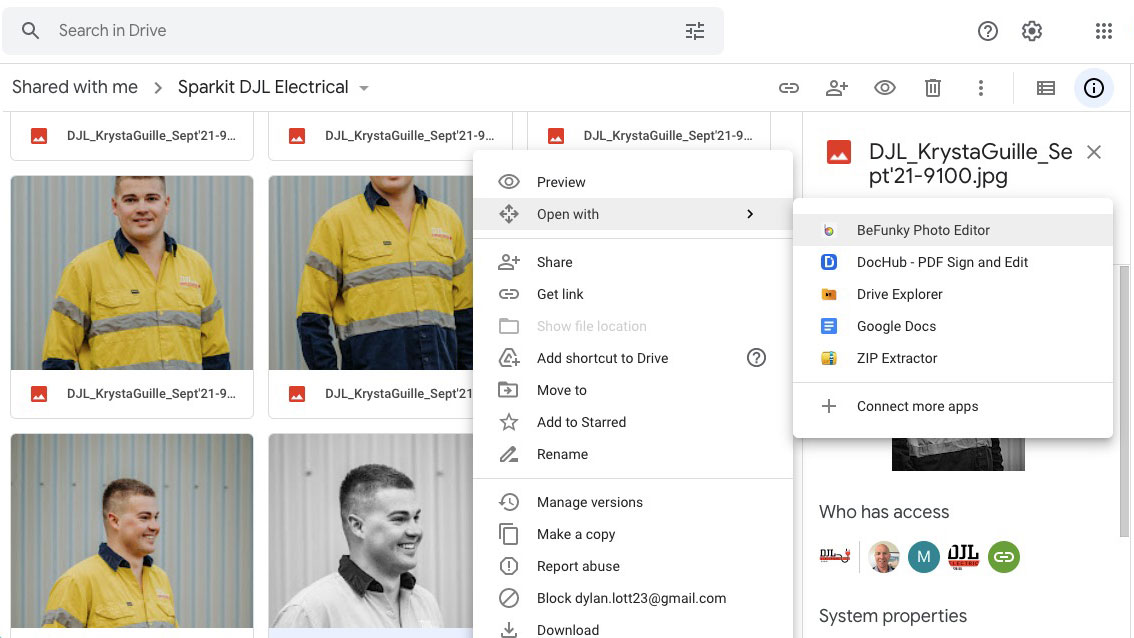
  2. Right-click any image > Open with > Connect more apps. This will bring the Google Workplace Marketplace popup

    befunky photo editor google workplace marketplace

  3. Search for “BeFunky Photo Editor” and install

  4. Once installed, follow the on-screen prompts to authenticate the app to manage your Google Drive files

Once done, you’re good to go. Just navigate back to your Google Drive folder and refresh. You should be able to right-click any image and open with BeFunky Photo Editor.

crop resize google drive images

While BeFunky got all the image editing tools you’re familiar with from desktop apps like Photoshop, I specially like the crop/resize feature and support for Google Drive to quickly import, resize, and crop Google Drive images.

How To: Extract All Images Embedded In .DOC Word Documents All At Once

And if you need fancier editing experience like text and graphics overlays for your ad banners perhaps or social media stuff, BeFunky got you covered. How cool is that?

Go check out BeFunky Photo Editor.

Quickly Crop, Resize Images on Google Drive - No Download Required

Not everyone finds remote work easy. When you associate home with a place of leisure, focusing on job-related tasks can be quite bothersome. However, many people are stuck inside their homes because of the ongoing pandemic, and there is no telling when they can go back to their regular offices.

Whether you like it or not, working remotely is something that will continue. And if you are one of those people struggling to find motivation when there is no supervision, rethink your routine. The tips below should help you improve productivity.

1. Maintain Computer in Good Shape

Let’s start with a computer, which is likely the most important tool of your work. If you have a personal computer, you should not have to worry about the performance too much so long as you maintain it in proper condition. Cleaning dust, keeping tabs on malware, and making sure there is enough free space on the drive are some examples of how to keep your computer in good condition.

A similar thing can be said about laptops. For example, if you own a Mac, you can be quite flexible and not limit yourself to working on a single desktop. Sometimes, sitting on a couch and having the laptop on your knees is a nice change of pace.

On the off chance that your Mac is slow and you cannot get work done on it, check if there are no viruses and clean the dust inside if too much accumulated over time. Lack of drive space and missing macOS updates could also be some of the reasons why the MacBook is not running optimally.

5 High-Capacity Laptop Power Banks for Your On-The-Go Lifestyle

Whether it is a desktop computer or a laptop, you want to make sure that your device is in proper condition. Otherwise, random crashes, freezes, and even restarts will get in the way of your work.

2. Stick to Schedule

Create a realistic schedule that you can stick to. If your work is flexible and you do not have to follow strict deadlines, you can take advantage of that and finish your work when you have the most motivation.

For some, working early in the morning is a problem because they cannot concentrate and look for distractions instead of finishing their tasks. On the other hand, when it is a bit later, doing the job becomes easier.

3. Take Breaks

Taking breaks is another important element to boost overall productivity. If you have no supervision working from home, it is quite easy to lose track of time and rush to finish tasks without considering how much of a toll it can take on one’s health.

Be it a small five-minute break to get away from a screen or an hour-long walk outside; take all the opportunities you can to relax and not overwork yourself just because you have the freedom to dictate your pace.

Also, have a proper lunch. If you have an hour, take that time to prepare yourself a proper meal and enjoy yourself while forgetting about work, even if it is only for a while.

4. Get Rid of Distractions

Distractions vary depending on your situation. If you live alone, you do not have to worry about other people disrupting your workflow (unless it is annoying neighbors). On the other hand, if you have a roommate or family, make sure to set boundaries by telling them that they should not disturb you unless it is necessary.

How To: Temporarily Block, Restrict Access to Unwanted Websites and Increase Productivity

Other than people, it is easy to get distracted by notifications on your smartphone. Disable those, so you do not get the urge to chat on social media when there is work to be done.

If you keep video game shortcuts on your desktop, you may be tempted to play them for a bit and put the work aside. It would be better to delete such shortcuts.

5. Keep in Touch With Others

Make sure to stay in touch with your friends, family, and coworkers. Other people are stuck at home just like you, and there are very few opportunities to socialize in person.

Thankfully, we can stay in touch with others using Zoom, Discord, Skype, and other communication tools. If nothing else, spending an hour or two talking to someone will be a great distraction from work.

6. Create Dedicated Workspace

Having a dedicated workspace is a neat trick to keep your focus. When you sit in front of a desk you have prepared for work; you will know that you should focus on the job and avoid distractions.

7. Make Most Out of Extra Free Time

The last piece of advice is to make the most out of the extra free time you have. Since you work remotely, there is no need to commute to work. Sure, sleeping longer is quite tempting, but you would benefit more by improving your skills or picking up a new hobby that you had no time for before the pandemic.

7 Ways to Ensure Efficiency While Working Remotely

I recently discovered that all my incoming emails from Yahoo Mail are no longer being automatically forwarded to my Gmail account. I previously set up an automatic email forwarding inside Yahoo Mail so that I can have a centralized view of all my emails from different email accounts.

Turns out, Verizon, the new owner of Yahoo Mail, officially discontinued support for automatic email forwarding for Yahoo Mail FREE users last January 1, 2021. Verizon cited security reasons for dropping the feature, which is often abused and used as vectors for hackers to obtain information from compromised accounts.

How To: Download Blocked Email Attachment in Gmail — Bypass Gmail Virus Scanner

You can still use Yahoo Mail automatic email forwarding though, but you’ll have to upgrade to Yahoo Mail PRO, setting you back around $34.99 per year or $3.49 a month.

However, if you don’t want to spend that much to forward all incoming emails from Yahoo to Gmail, then, read on!

Automatically Sync, Forward Yahoo Mails to Gmail

The trick is easy: just grab your iPhone and open your Gmail app and then add your Yahoo Mail account via Gmailify

yahoo-email-forwarding-to-gmail-free

Just follow the on-screen instructions until all your Yahoo mails are in sync. No more missed emails plus you get the best anti-spam protection from Gmail.

How To: Enable Yahoo Email Forwarding Without PRO Account

If you’ve been using Chrome for a while, you probably have noticed that nice PiP icon that sits on your toolbar when you’re on a page that plays a video. As soon as you hit that PiP icon, a sleek, resizable floating window will popup within your screen. That’s Picture-in-Picture (PiP) in action, a feature recently added built-in on Chrome.

Now, what if you want to achieve the same feat for virtually any tabs, not just for videos? Well, that’s basically the premise of this brand new extension called TabFloater.

How To: Use iOS 14 Picture-in-Picture on YouTube App (No Jailbreak)

Currently, available for Chrome and Firefox (Windows for now), TabFloater lets you easily multitask & interact with other tabs. You don’t have to switch between tabs to copy or compare stuff.

"I created a browser extension called TabFloater, which can replicate the picture-in-picture functionality with any website. It moves a chosen tab into a smaller window, which is going to remain always on top, so you can interact with both websites at the same time." — Balázs Gyurák, Creator of TabFloater

Getting Started with TabFloater

Just like any browser extensions, getting started with TabFloater is straightforward. Just get your copy at their website and install the companion app. And you’re good to go.

Caveats

Unlike those PiP videos that play on a sticky window regardless of which app screens you’re on, TabFloater will only be active within the parent app of course. So, if you close or minimize your Chrome or Firefox, TabFloater will exit too.

Additionally, TabFloater currently works on Windows. So for Mac users, it will come up soon. The add-on creator does invite interested party to develop TabFloater Companion for Mac. Just comment on the official GitHub repo.

TabFloater Adds Picture-in-Picture Support to Any Tabs (Chrome/Firefox)

Macs are fast, high-performing, and reliable computers; therefore, they are trusted by many professional individuals and brands.

However, a device like Mac can only reach its maximum performance and efficiency if you know how to take care of it correctly and take time to learn its neatest features that can enhance your productivity.

Thus in this article, you will find a list of 10 quick and easy tips that will help improve your Mac's efficiency by keeping enough free storage space and applying such useful tips as to how to crop photos on mac.

Tip #1: Check Storage Space

Checking storage space should become a habit so that you learn to keep on track with it regularly. Knowing how much free disk space you have left is important because if you fall below 10% of free storage space, your Mac will become slow and start underperforming.

The easiest way to track your storage space is to click on the Apple icon, go to the option About This Mac, and click on the Storage tab.

Tip #2: Uninstall Apps You Do Not Use

Apps can take up quite a lot of space, and to make sure that you have enough free disk space and can easily find the apps you need, uninstall the ones you no longer use.

Look for two types of apps to uninstall. First, start with the game apps you have downloaded just for fun and never really play. Secondly, look for multiple apps of the same type, such as time-planning apps. If you have five different ones, you probably only use one.

Tip #3: Remove Large Files

Moving forward, remove large unneeded files to make more storage space on your Mac. To locate these files, you can go directly to the Downloads folder that stores all of the files that you download from the internet; thus, it may include quite a few one-time use files.

Also, in the Storage tab, you can click Manage that will open a new menu with four suggestions that can help clear system storage. The option called Reduce Clutter will guide you through large files and other documents that you might not need.

Tip #4: Clean Your Desktop

To become more efficient, keep a clean desktop. Maintaining hundreds of items on your screen will make it difficult to locate the files you are looking for. More to it, if you do not name your files properly, you may send the wrong file to a client of yours.

Also, the more thumbnails you have on your desktop, the slower your Mac becomes. To display every icon, the computer is using system resources, which slows down your Mac.

Tip #5: Empty the Trash Bin

If you have recently deleted a bunch of files to clear some system storage, do not forget to remove them from the Trash Bin as well.

Remember that as long as you keep the deleted files in the Trash Bin, they are still taking up disk space and slowing down your Mac, thus making you inefficient.

Tip #6: Use Cloud Storage

For creative people who work as graphic designers, photographers, or video editors, it may be difficult to keep enough free storage space. Therefore, another solution, such as using a cloud storage service, might be necessary.

More to it, using a cloud service will bring in more benefits, such as easy file access and sharing.

Tip #7: Invest in External Storage Solutions

However, to use a cloud storage service efficiently and without any annoying interruptions, you will need to ensure a strong network connection.

If that is not possible, you should consider investing in external storage solutions, for instance, external hard drives or USB keys. On the other hand, make sure you keep the files you use daily on your computer for fast access.

Tip #8: Use Streaming Services

Using such streaming services as Netflix or Spotify can help you keep more free disk space at all times and result in a better performing computer.

First of all, you will not have to download large media files to watch a movie or listen to an album by your favorite artist. Secondly, if you enjoy watching tv series, you will not have to worry about deleting the episodes that you have already watched.

Tip #9: Update the macOS Regularly

The Apple company has been working on developing and improving its devices and software for years and is still doing it constantly to provide you the best performance possible.

However, if you want to be using the best version of the device you own, you need to update the macOS regularly. Once you skip an update, you can find it in the System Preferences.

Tip #10: Learn How to Crop Images

You may think that you need to download photo editing software if you want to crop images on a Mac, but there is actually an easy way to do it without installing any new software.

The fastest method to crop images on your Mac is by using a built-in app called Preview. Once you open the image you want to crop, choose the Markup tools to cut out the part of the image that you want.

10 Efficiency Tips for Mac Users

Local Files Not Syncing on Spotify iOS App? Here’s How to Fix

There’s this recurring issue of Spotify that we’re all too familiar with: local files stored from our computer suddenly don’t sync over to Spotify’s iPhone app. A quick Google search reveals it’s an issue affecting thousands of users. And sure it’s straight out annoying, considering that you lose access to tens or hundreds of local tracks coming from sources outside of Spotify.

Spotify, despite being the streaming behemoth that she is, is still marred with performance and playback issues that are too random that sometimes you get a random fix. This Spotify syncing issue usually happens immediately after a major update on its iOS app. Spotify could be introducing new features or purging locally stored data, causing synced local files to get wiped out.

Why Local Files Are Not Syncing on Spotify

There are a few reasons why local files fail to sync. First, you might have unknowingly deleted or moved the local files on your laptop. This action of course confuses the Spotify app on your desktop so it can no longer locate the local files. Second, for local syncing to work, in your Spotify desktop app, you’ll have to “Download” those tracks as well.

How To Fix Spotify Local Files Not Syncing

If you’re sure your local files are untouched and you encounter this Spotify synchronization issue. Follow these steps:

  1. Ensure you have the latest copy of Spotify installed both on your iOS and desktop app, and ensure you’re connected to the same network
  2. Restart both apps on your iPhone and desktop
  3. On your desktop, ensure you “Download“ the entire playlist where your local tracks are stored
  4. Go back to your Spotify iOS app. Go to Settings > Local Files and ensure Local audio files is toggled.
  5. Navigate to that same playlist and click the green "Download" icon.

You’re done. For best results, also ensure your iPhone is not on “Low Power Mode”. Low Power Mode limits background activity such as downloads & syncs.

Local Files Not Syncing on Spotify iOS App? Here’s How to Fix

A few days ago, I was asked to upload a bunch of client testimonial videos to Vimeo. The videos are about 2+ GB in size total, and they all sit on DropBox shared with me by one of our clients. And me being on the other side of the planet with a limited internet data allocation and unreliable internet, I can’t afford to waste time and manually download them all locally and upload them to Vimeo. Sure it will take me forever to do just that.

A quick look on Vimeo’s dashboard doesn’t offer much help. There’s no “import DropBox to Vimeo” or equivalent that could help me move those videos from DropBox to Vimeo with ease. All I got is an UPLOAD” button that prompts you to locate your videos locally hosted on your computer.

5 Ways To Free Up, Increase Your DropBox Disk Space

After a few tinkering, I realized that there’s indeed a way to send and import videos from DropBox to Vimeo. And it’s easy to miss it because it’s hidden somewhere.

So, how do you import or upload videos from DropBox to Vimeo and save time?

The trick is easy: just head directly to https://vimeo.com/upload. On the right, click on the DropBox icon. It will bring in a DropBox dialog where you can choose the videos to import. And your videos will be automatically imported in seconds to Vimeo.

You can also import, upload videos from Google Drive to Vimeo. Just click on the Google Drive icon right beside the DropBox button.

How To: Import, Upload Videos from DropBox to Vimeo in Seconds

iOS 14 is coming to iPhone! Just like Apple’s previous releases, the upcoming iOS 14 is packed with features that will redefine everyone’s iPhone experience.

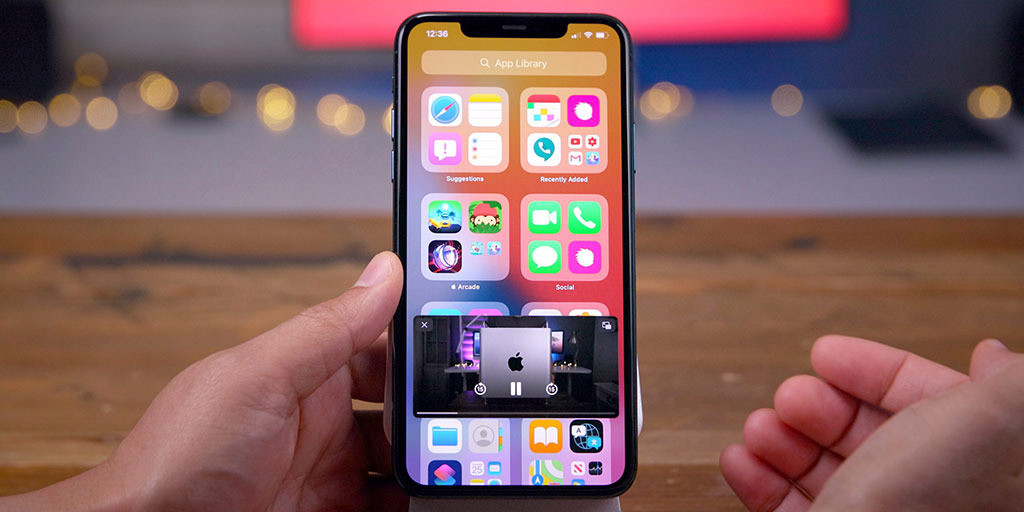
One of iOS 14 much-awaited features is the introduction of Picture-in-Picture (PiP) playback on iOS (finally). That is, with PiP officially coming to iPhone, you’ll be able to multitask and navigate to other apps while a small, resizable window floats on your device’s screen.

iOS 14’s Picture-in-Picture playback will be officially supported on iPhone’s stock apps like FaceTime and Safari. In Safari for instance, you can play whatever video source and enable Picture-in-Picture with just a few taps. This makes it possible to do PiP on YouTube as long as you view it inside Safari.

But, what about PiP in YouTube app?

Unfortunately, PiP isn’t automatically enabled on third-party apps like YouTube. It’s up to individual third-party apps like YouTube to follow suit. And if for some reason Google won’t update their official YouTube app and bring support for PiP, then, here’s a neat trick to do Picture-in-Picture in YouTube app.

What you need:

  • Shortcuts iOS app installed
  • A copy of YouTube App PiP Opener by Nangu

Using Shortcuts to Enable PiP on YouTube iOS App

  1. First off, add YouTube App PiP Opener shortcut and ensure it’s shown in Share Sheet (this is a one-time setup)

    ios 14 youtube app picture in picture

  2. Ensure you allow custom shortcuts to be ran. Go to your device’s Settings > Shortcuts and enable Allow Untrusted Shortcuts
  3. Launch YouTube app. Play whatever video you want.
  4. While video is playing, hit Share icon. This should bring iOS’s Share Sheet.

  5. Tap on YouTube App PiP Opener. It should launch and transfer video playback to Safari.
  6. Just go fullscreen and tap the PiP icon. You’re done.

See, we’re exploiting Shortcuts’ app to view YouTube videos in PiP mode. Not the most elegant solution but it’s a nice workaround while waiting for YouTube’s turn to finally bring Picture-in-Picture to its official iOS app.

How To: Watch YouTube, Netflix on Sticky, Floating Window While Keeping Other Apps Opened

How To: Use iOS 14 Picture-in-Picture on YouTube App (No Jailbreak)

With current COVID-19 pandemic situation, many people have been confined to their homes. Due to this, the majority of people are very idle in their homes and are not earning any income. Well then, in case you are one of them relax because you are in the right platform, below are some of the demand skills you can learn within 1-3 months while under home quarantine;

1. Coding

Coding is one of the demand skills in the market today and the best thing is you don't have to professional in coding to secure a job. With just basic skills you have chances to secure a job opportunity. One can start learning CSS and HTML coding and later advance to JavaScript. One can enrol for an online coding course at Udemy or any web development Bootcamp. Further, there are many basic tutorial videos available in YouTube which are resourceful to enable one to comprehend various coding languages.

2. Freelance Writing

Writing is one of the demand skills which is considered an asset because you can employ yourself and be your own boss. Freelancing involves writing online articles for various clients and submitting them through a certain forum. What you need is to have good grammar in the language you are writing. In case you are not a native speaker of that language, don't worry you can sharpen your skills by reading an introduction to freelancing guides and within a few months, you will be an amazing writer.

How To Score Cheaper Airline Tickets with Google Flights’ Fare Alerts

3. Web design and development

Many companies are looking for experts in web design to enable their clients to increase their ranking in various search engines. One can learn web design via online tutorials and doing more practical work. However, you need computer literate to understand how web design is done.

4. Blogging

Being a blogger isn't hard. You just have to create interesting and well written online content. For you to be a good blogger you just have to write interesting and high-quality content in your blog. You can advance your skills by visiting the various blog and get to understand how they can attract many people.

5 Ways To Free Up, Increase Your DropBox Disk Space

The secret behind being a good blogger is concentrating in one area for example about fashion or politics. By so doing you will get knowledgeable on that area and you will your blog post will be very influential. These days you can create your blog for free in various websites like Wordpress etc.

5. Graphic design

This is one of the marketable skills in the market. This is because many businesses have to come up with unique logos and images which will make them outstanding in the market. You can learn graphic design from platforms such as Lynda.com and within 3 months you will have a strong foundation in color, typography and layout. You can practice graphic design by using Photoshop, Illustrator and InDesign.

There are many demand skills you can learn while under home quarantine for a few months and help you make income during this pandemic or even secure well-paying jobs after this pandemic is over.

Top 5 In-Demand Skills to Learn During COVID-19 Home Quarantine

There’s another iOS text bug making the rounds of the internet today that renders anyone’s iPhone useless. And Apple is currently rolling out a patch to fix this so be sure to update your iOS immediately to iOS 13.4.5 beta.

So, the offending text is a combination of an Italian flag emoji and Sindhi character. As soon as it arrives on your inbox as a text message or through your WhatsApp or Messenger, your iPhone will become unresponsive, forcing it to restart your iPhone.

Apparently iOS has an issue dealing with that offending text as soon as it arrives in your notification tray, causing it to exhaust all its internal resources and eventually crashing your device. This is similar to the 2017 iOS text bug that crashes your iPhone as soon as you get a message containing a specific Telugu characters.

This Website Lets You Prank Your Friends with Fake System Updates

Apple is said to be seeding out an update to fix this Italian emoji and Sindhi bug. So be sure you’re getting the most recent update from Apple. Alternately, you can temporarily disable notifications from your iMessage, WhatsApp, and Messenger.

Anyone Can Remotely Crash Your iPhone thru SMS with this iOS Text Bug

If you’ve been using DropBox since its inception back in 2008, chances are your FREE DropBox account now is either full or about to run out of space. That’s especially true if you’ve been using the platform as your go-to repository to store your personal and work-related files. That’s a massive 12 years of backup files to date.

While there are a handful of newcomers offering the same DropBox-like functionality + FREE disk space, nothing beats the niftiness and simplicity of DropBox. Not to mention the fact that DropBox has been used by well-known digital companies so we can be sure our data is well-protected.

DropBox’s Basic Plan gives you 2GB of disk space. Sure it’s not enough. And if you’re a freelancer who isn’t ready yet to upgrade, then, read along as I’ll show you how you can get as much as 20GB of disk space from DropBox at no additional cost.

(Note: 2TB starts at $9.99/month, if things aren’t tight please consider upgrading to paid plans)

Here are 5 legal ways to increase your DropBox disk space for FREE

  1. Delete unused files

    Digital assets such as images, PSD, XD, and other Adobe files can easily eat up our DropBox disk space. Visit each and every single folder and see if you can safely remove those files. If it’s already a one-year-old project or so, better delete them.

    Removing those unused files and folders can quickly regain the extra DropBox disk space you need.

  2. ZIP/compress folders

    If you have a large folder on your DropBox you want to keep but don’t constantly use, try archiving it and zip it. You can save as much as half of its size. You can even further reduce it by using the most optimized compression method or use GZIP format to shrink its size.

    How To Unzip Archived Files in DropBox without Downloading them Offline

    Of course, you don’t want to archive those folders you’ll likely access in the next few months. Just archive those 1-2 years old project folders that you don’t have reasons to access again.

  3. Take Advantage of DropBox Referral System

    DropBox has an existing referral system that rewards you with 500MB bonus space for each successful referral installs. Just go to https://www.dropbox.com/referrals page to get your unique link and you can start inviting friends to signup.

    Get A List of All Google Drive Files & Folders in Google Sheet

    A lot of people have been gaming this system and was able to snatch as much as 16GB of bonus disk space. The popular method includes using virtual machines and doing fake installations using their own referral link. DropBox requires each referred account to install its Windows or Mac app before rewarding the extra 500MB bonus disk space.

  4. Move your backup files to other cloud services

    Again, DropBox has attracted tens of competitors trying to get a slice of the pie. Popular cloud storage platforms include Google Drive, OneDrive, Otixo, Mover.io, ZeroPC, etc. What these guys have in common is that they have free plans that give you as much as 30GB of FREE cloud storage space.

    You now have multiple options to choose from to unload some of your files and free up your DropBox disk space. You can go classic by downloading your DropBox files and upload them to your cloud storage of choice or you can use cloud storage management platforms such as Otixo to move files between multiple cloud storage providers. Doing so guarantees to free up your DropBox disk space.

  5. Upgrade your DropBox plan

    If you want to skip the headaches of increasing your DropBox disk space, then, this would be your last option. DropBox Plus tier sets you back $9.99 a month which gives you 2 TB storage space. That should already be enough storage space for your digital life.

Wrapping it up

Our work-related stuff can easily eat up our DropBox 2 GB storage space. While there are other cloud storage platforms we can check out, it’s the security & simplicity of DropBox that makes it hard to depart. And if you’re unprepared to upgrade to a much higher storage plan, you can try the above suggestions to free up and increase your DropBox storage space.

5 Ways To Free Up, Increase Your DropBox Disk Space

Few days ago, I was confronted with this situation where I needed to get a specific file within a zip file shared to me on DropBox. The trouble is, the archive file is over 2GB in size and I am on a limited internet data connection and I can’t afford to waste time downloading the entire 2GB file just to get a specific file for my web project.

Such dilemma would’ve been not a problem if, and only if, DropBox has a built-in file management system where you can zip or unzip files in DropBox website. However, as you might already know, DropBox web app is still deprived of such functionality. And there are no DropBox App Extensions that can do basic archive file management.

So normally your only way out is to download the entire ZIP file on your local drive and do the actual unzipping on your machine, which sounds very much unacceptably antiquated.

Because 2GB of data would cost me $5 in my country to download (and $5 is not cheap), I had to find a way how to unzip DropBox files without downloading them first. Thankfully, I found a way out, albeit not the most straight-forward. And this article, I’m going to show you how.

What you need

  • DropBox account
  • Google Drive account
  • Otixo account (or other free cloud file management apps)

Cutting off the crap, this method works this way: using Otixo service, we remotely copy those zip files from DropBox to Google Drive. And once those zip files are transferred to Google Drive, you can unzip them straight from Google Drive website.

How to unzip Dropbox files without downloading them first offline

For the purpose of this tutorial, I'm going to use a demo file globe-at-home.zip which sits right inside my DropBox account

  1. You’ll have to signup or login first to Otixo and connect your DropBox and Google Drive cloud accounts. Otixo has a decent file management functionality where you can connect multiple cloud drives into a single interface so you can quickly manage your files from multiple sources. We wrote about it before, so go check it out.
  2. Once you’ve added both your DropBox and Google Drive accounts, copy your DropBox ZIP file to your Google Drive. The transfer should take in seconds.

  3. As soon as you hit the Copy button, the ZIP file should arrive on your Google Drive account.

  4. Now, you're ready to unzip the archive inside Google Drive. To do that, you'll have to add ZIP Extractor as add-on to your Google Drive. See our guide here.

    Once ZIP Extractor is added, you can open your archive file with ZIP Extractor, as seen below:

  5. And finally, selectively extract the contents within that ZIP file.

You're done!

Best & FREE Alternatives To Otixo To Manage Multiple Cloud Storage Accounts

ZIP Extractor will then automatically create a new folder containing all the extracted files within that folder where the original ZIP file is located.

Final Verdict

Being able to unzip files in DropBox isn't natively supported yet on DropBox web app. However, with a little bit of creativity, we can achieve the same feat by moving that ZIP file from DropBox to Google Drive and do the extraction in the latter. Well, thanks to Otixo.

How To Unzip Archived Files in DropBox without Downloading them Offline

Set up sleep timer Spootify iOS

Music streaming giant Spotify silently rolls out an update to its iOS app which finally brings a sleep timer support for its app. No need to separately launch the iPhone’s Clock app.

Setting up a sleep timer on Spotify

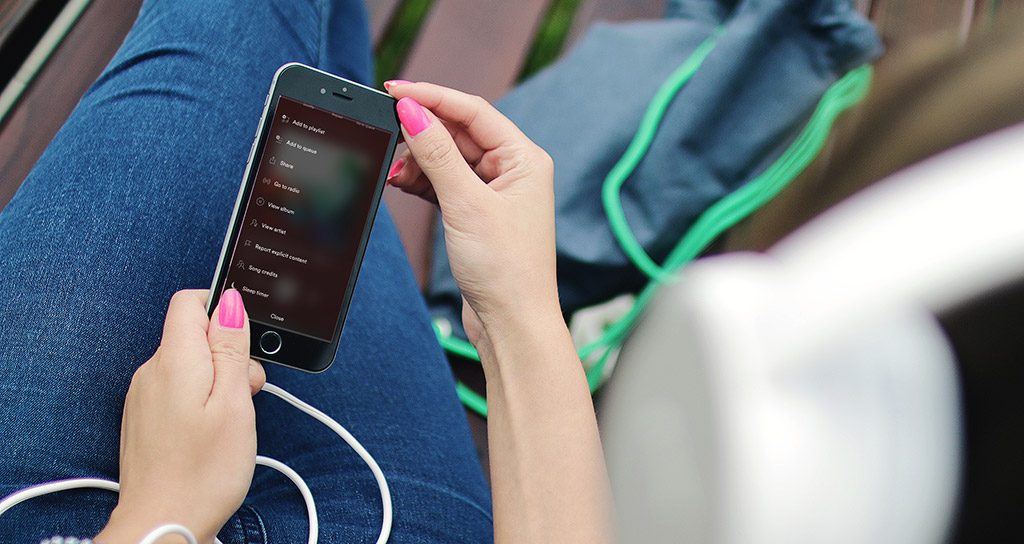
To set up a sleep timer on Spotify, be sure you’re getting the latest update of the app. While your Spotify songs are playing, launch the Now Playing screen, tap the tiny three dots that sits in the upper right of your screen, and then scroll down a bit until you see the “Sleep timer” option. From there you can set a timer from 5 mins to 1 hour.

To turn off sleep timer on Spotify, just redo the above steps and in “Stop audio in“ screen, just tap ”Turn off timer“.

How To: Watch YouTube, Netflix on Sticky, Floating Window While Keeping Other Apps Opened

As a music app, a sleep timer is a hotly-requested feature of Spotify which lets you doze to your favorite songs without draining your iPhone’s battery. It’s a feature first introduced to the Android version last year. iOS users, on the other hand, resort to the iPhone’s Clock app to stop audio playback on Spotify at a predefined time.

Spotify iOS App Gets Native Sleep Timer Support

Found this cool website that lets you generate a WiFi sign and QR code so people can easily connect on your network. The service is called My WiFi Sign, which comes in handy when you want to skip the headache of sharing your WiFi credentials at home or office.

All you need to do is head to My WiFi Sign, supply your network credentials and in seconds you get a nice-looking PDF complete with your WiFi info which you can quickly print. Additionally, you get a unique QR code which your visitors can scan to quickly connect on your network without typing anything.

How awesome is that?

So, when a visitor or your child’s friends come in, you can just quickly point them to the printed My WiFi Sign rather than awkwardly reach to your access point and find the credentials.

New QR Tagging Service Helps You Find Your Lost Stuff

Not everyone will probably appreciate this but if you host an event or you own a shop, having a scan-to-connect QR code will do you a favor.

Go, check it out!

Quickly Create Printable Wifi Signs and Scan-to-Connect QR Codes

On average, I get around dozens of promotional spam text messages in a week from different lending companies offering their loan services. Not to mention the pesky offers from my telco and its merchant partners who aggressively promote their products through SMS.

Getting 20 unsolicited SMS in a week may not sound like a lot. But I felt harassed knowing that they have access to my personal contact number and they can anytime shoot me an unwanted SMS without my permission.

Truth is, while the internet is still the most effective place to attract customers, a handful of marketers still turn to robocalls and SMS marketing as a way to generate leads. They’ll assault your iPhone’s inbox with offers and yes, even dirty texts containing links of adult websites. And the most clever part is: they’ll use a different random number to text blast; not too easy to block and stop.

Well, not until today.

How To: Block Ads on iOS, Including Facebook Ads and Youtube Video Ads (iPhone & iPad)

If you’re using the iPhone and tired of getting spam text messages from lending companies and random people, now is the time to take action and permanently block those spam messages. And nope, you don’t have to jailbreak your iPhone just to accomplish it.

Meet VeroSMS, the Best iOS App to Block Spam Texts on iPhone by Keywords

Upon hearing VeroSMS’ promise of permanently blocking unwanted SMS, I didn’t easily get excited, to be honest. First, I thought it’s not at all possible to manipulate iPhone’s SMS inbox considering the well-protected iOS ecosystem. Or, even if you can do it, you’ll have to engage in the risky business of jailbreaking.

But I was wrong.

VeroSMS works flawlessly during my test and I don’t even have to upgrade to a $2.99 premium version just to get the job done. This iOS-only app automatically blocks incoming SMS matching my custom-defined keywords.

No more nasty alerts from spammers. All unwanted SMS are automatically rejected under SMS Junk tab in the iPhone’s Messages app. Yep, the nice thing about it is while iPhone won’t alert you for incoming spam messages, the app still keeps a copy of every unwanted SMS so you can anytime check back.

How To Stop, Block Spam Text on iPhone by Keywords or Phrases

Getting started is easy. All you have to do is:

  1. Download and install VeroSMS from App Store.

  2. Launch the app. If this is your first time opening the app, you’ll be asked to Enable VeroSMS Spam Filter. Just go to Settings > Message > Unknown & Spam. Under SMS Filtering, enable VeroSMS.

  3. Navigate back to VeroSMS app. From Blocklist section, you can define your own keywords

    The paid version already comes with crowdsourced keywords so you can pretty much skip this step. However, you can also add your own, localised keywords, which makes this app really useful.

  4. Now, see your iPhone magically junks those spam text inside your iMessage app. All matching text messages will be stored in SMS Junk tab. And you don’t hear a notification when a spam text arrives.

Note: Only those SMS coming from unknown phone numbers will be filtered out by VeroSMS. If a text message comes from someone in your contacts list, VeroSMS will see it as important and it won’t tag it as spam.

How To Automatically Block Spam SMS By Keyword on iPhone (No Jailbreak)

YouTube, without a doubt, is everyone’s choice when it comes to entertainment and general info. With thousands of fun and informative videos being uploaded by the minute, it’s not uncommon for anyone to generate content out of existing YouTube videos.

How To: Watch Rated-R, 18+ Videos On YouTube Without Logging In or Signing Up

Teachers for instance can use copyright-free videos from YouTube to come up with supplemental video for their pupils. They can grab multiple, existing YouTube videos and do a bit of editing to produce a new video resource. Or if you’re a casual YouTuber like me, you may want to crop a YouTube video and get your favourite part to share as a meme.

Whatever the motivation is, trimming and making YouTube videos shorter doesn’t really have to be complicated. Truth is, there are free, online YouTube video editors that let you do basic trimming and cropping by simply pasting YouTube URLs.

5 Best Online Apps To Crop, Trim YouTube Videos

  1. YT Cutter
    This ad-supported web app lets you extract favourite scenes from YouTube videos. Using the app is pretty much straight-forward. All you need to do is to paste a YouTube link and specify start and end time parameter. Once done, you have the option to download the cropped video, audio or GIF.

  2. Kapwing Video Trimmer
    Kapwing’s Video Trimmer makes cutting YouTube video a breeze. The service offers the same video cropping capability but with a much nicer interface. After pasting YouTube video URL to crop, you can adjust which parts of YouTube videos to trim using easy-to-use, timestamp slider.

  3. YouTube Trimmer
    Yet another free tool to trim, crop YouTube videos is Youtube Trimmer. The website may look simple but it offers surprisingly fast and easy way to trim, crop favourite parts of your Youtube videos online. Just supply the YouTube video URL and specify the start and end times for the crop.
  4. YT Cropper
    And if for some reason you’re running out of options to make a YouTube video shorter, you may check out YT Cropper. Just supply the URL and adjust the handles to crop. Once done, hit “Crop” and let YT Cropper generates a custom embed code for you. Unfortunately, YT Cropper won’t let you download the cropped video for offline use. Sucks.
  5. YT Videos Cutter by odownloader
    Yet another ad-supported YouTube trimmer which lets you cut YouTube videos in seconds. The good: it gives you the option to download either audio only or full video. And you have the option to select .webm and .mp4 formats. The bad: lots of ads.

How To: Watch YouTube, Netflix on Sticky, Floating Window While Keeping Other Apps Opened

There you go! If there are other YouTube video editing apps out there that deserve a mention on this blog, just get in touch.

Top 5 Online Services to Trim, Cut YouTube Videos for FREE

Have you ever been in a situation where you wished you could get a simplified list of Google Drive files and folders in a Google Sheet?

If you’re working as a graphic designer or web developer, chances are you’ve probably gone through that occasion where you needed to juggle through multiples files and folders just to get the file you want.

Google Drive’s built-in file explorer isn’t that intuitive enough. Rummaging through hundreds of files can be too overwhelming, to say the least. Well right now, not anymore!

How To List All Google Drive Files & Folders in Google Sheet

Meet Drive Explorer, it’s a tiny little add-on for Google Sheet that lets you export all (or selected) files and folders into a much readable spreadsheet format.

Drive Explorer (formerly Drive Direct Links) lets you pick folders/files from your Google Drive, Shared Drive or the files shared with you to export to the Google Sheet. Sheet columns contain metadata of the files like name of the file, containing folder, folder path on your Google drive, direct download link, etc.

How Drive Explorer works:

  1. You install the add-on and connect your Google account
  2. Once connected, go to your Driver folder and create a spreadsheet
  3. Inside your spreadsheet toolbar, click on Add-ons > Drive Explorer > Select files/folder.
  4. And finally, wait for a few seconds until your spreadsheet is automatically refreshed containing your files/folders’ meta info such as folder names, filenames, folder paths, links, etc.

When is it useful?

Being able to view your Google Drive files and folders in a list helps us save time and improve team collaboration. If you own an online store and works with VAs to manage inventories, this add-on definitely comes in handy.

In our day job, for instance, we constantly update images on our client’s websites. And our clients usually just share a large Drive folder containing all the images that need to be uploaded to their website. With Drive Explorer, we can now easily get a decent list of files in that shared folder so our team can easily collaborate rather than going back and forth on Google Drive.

5 Handy Google Sheet Tricks To Help You Work Fast & Save Time

Get A List of All Google Drive Files & Folders in Google Sheet